Something Wicked this way comes!
18" Dayton Audio RSS460HO-4 subwoofer
Sealed 110 liter Plywood/MDF/HDF enclosure with intricate internal bracing
Airtight Speakon connector, 1" Industrial rubber feet.
Painted with Rustoleum Hammertone "Black"
 |
| Internal braces |
 |
| Braces dry-fit, this is the back of the subwoofer |
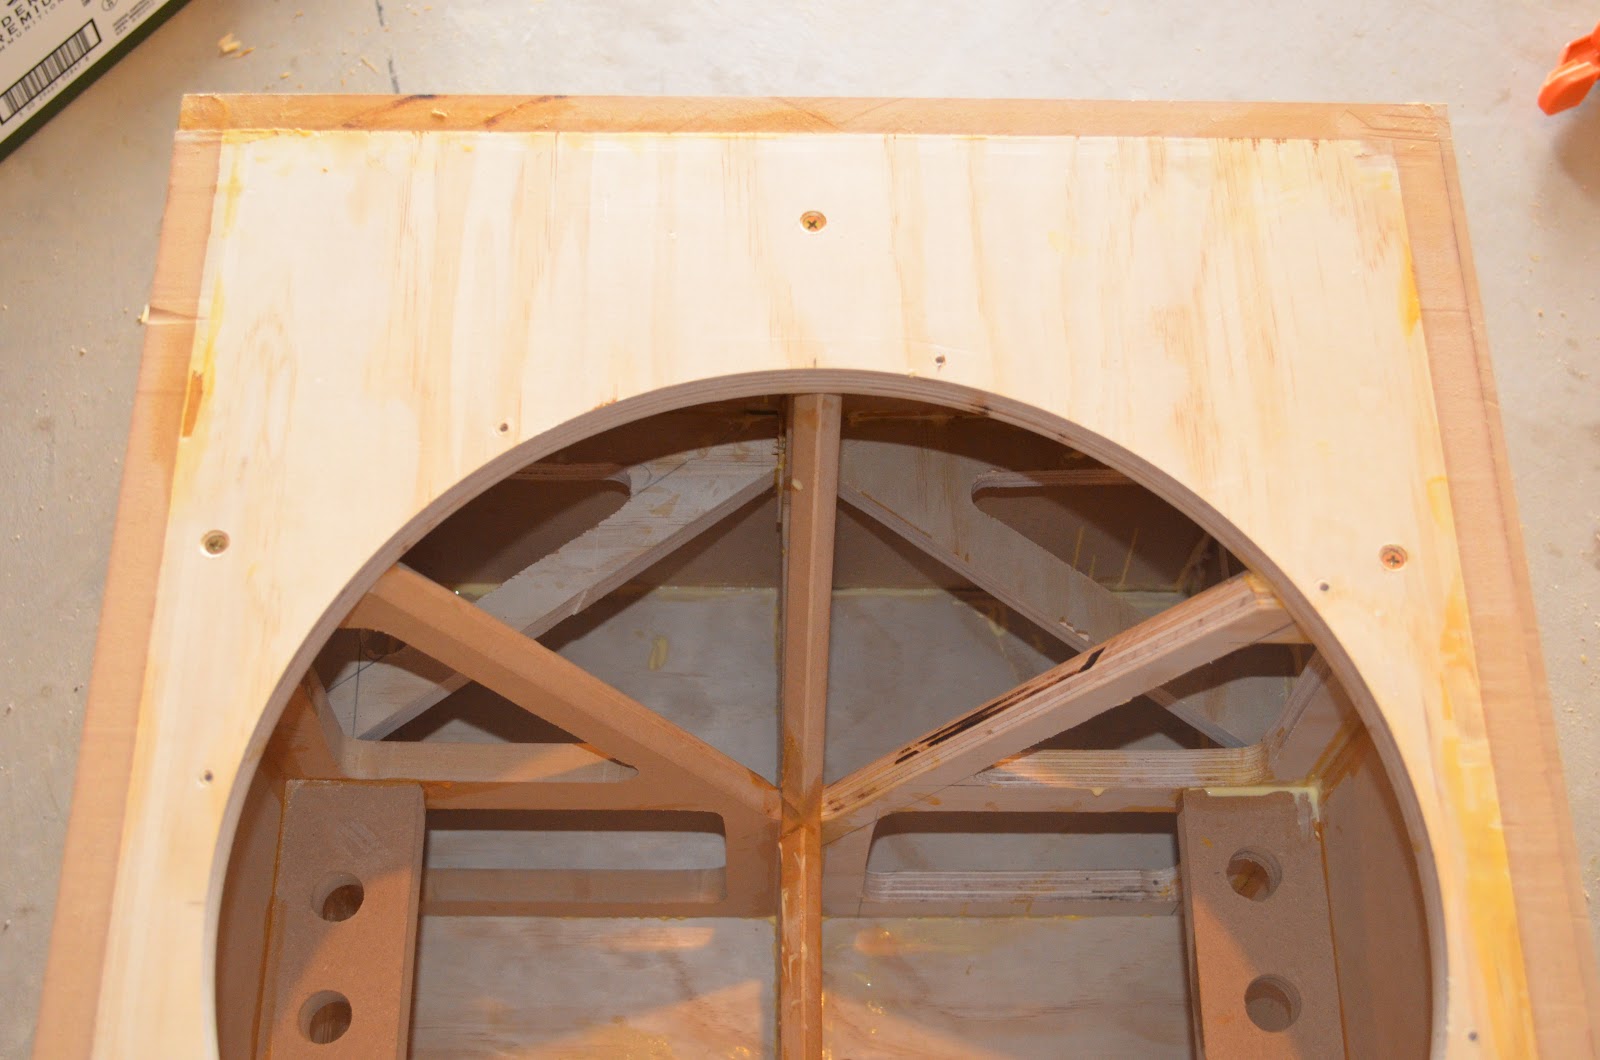
 |
| Detail of internal bracing system. It's a tight fit. |
 |
| Gluing it up with corner clamps and bar clamps |
 |
| The box is made of 3/4" plywood and some 3/4" MDF |
 |
| All seams were screwed and glued. Uneccesary. |
 |
| Added more braces to my braces |
 |
| These corner braces were meticulously cut to fit tightly |
 |
| Looking through the front hole. This is one baffle, the next is comign soon. |
 |
| Adding the second baffle, using all my clamps |
 |
| A little bit of squeeze-out |
 |
| A little gap there, but it's clean. |
 |
| The woofer sits just slightly proud |
 |
| DIY family: 12" Raven subwoofer, 18" Wicked subwoofer, and curved Mandolin speakers |
 |
| Added hardboard to the top and sides, and then flush-trimmed the front. This actually wored really well. |
 |
| The hardboard made it thicker, smoother, and covered up the screw holes |
 |
| The back was also skinned with 1/8" hardboard |
 |
| woofer cutout with all internal bracking visible. This is a stiff cabinet |

 |
| I added about 4 layers of grey spray primer, and now Rustoleum Hammertone is going on |


 |
| I probably could have masked off the inside, but I didn't really care about some overspray |
 |
| Airtight speakon connector with rubber gasket |
 |
| Added some R-13 fiberglass insulation. Actually this is overstuff and I need to remove most of this. |
 |
| 18" subwoofer next to 12" subwoofer |
 |
| One subwoofer is a little proud, the other is recessed |
 |
| DIY family, part 2 |
No comments:
Post a Comment